¶ Creating Tattoos and Makeup
This guide will primarily cover creating face tattoos using Blender (to paint) and Photoshop (to compile into an atlas). Body tattoos are very similar and will only require a few extra steps when setting it up using Volno’s Texture Tools.
Alternatively, Substance Painter can be used instead of Blender, as can GIMP/Paint.net/etc. for atlas work.
¶ The Basics
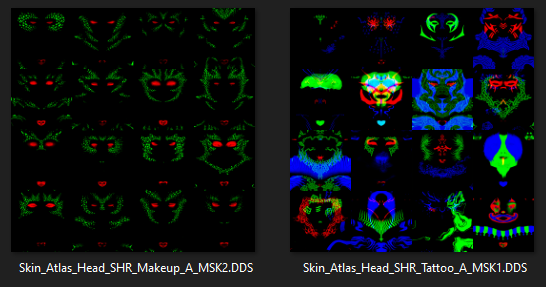
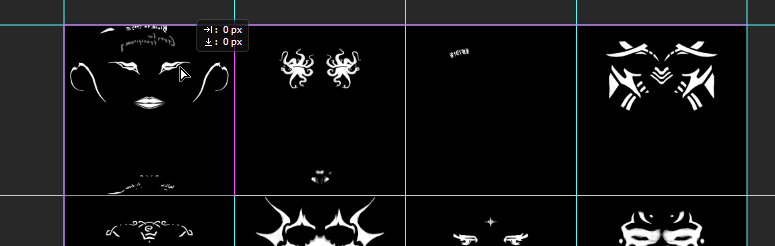
The tattoos and makeup are all located respectively on a single atlas file, utilizing a grid and channels to determine number and order of the individual options.
- These are each a 4x4 grid with a resolution of: 4096x4096, meaning each individual option is 1024x1024
- It is possible to use upscaled atlases with a resolution of 8192x8192, with individual options being 2048x2048 (recommended as you have more to work with)
- Kazstra Virtual Tav (KAVT) has extended this further, utilizing a tattoo atlas size of 8192x16384 and a makeup atlas of 4096x8192 - both doubling the ammount of options you can have in CC
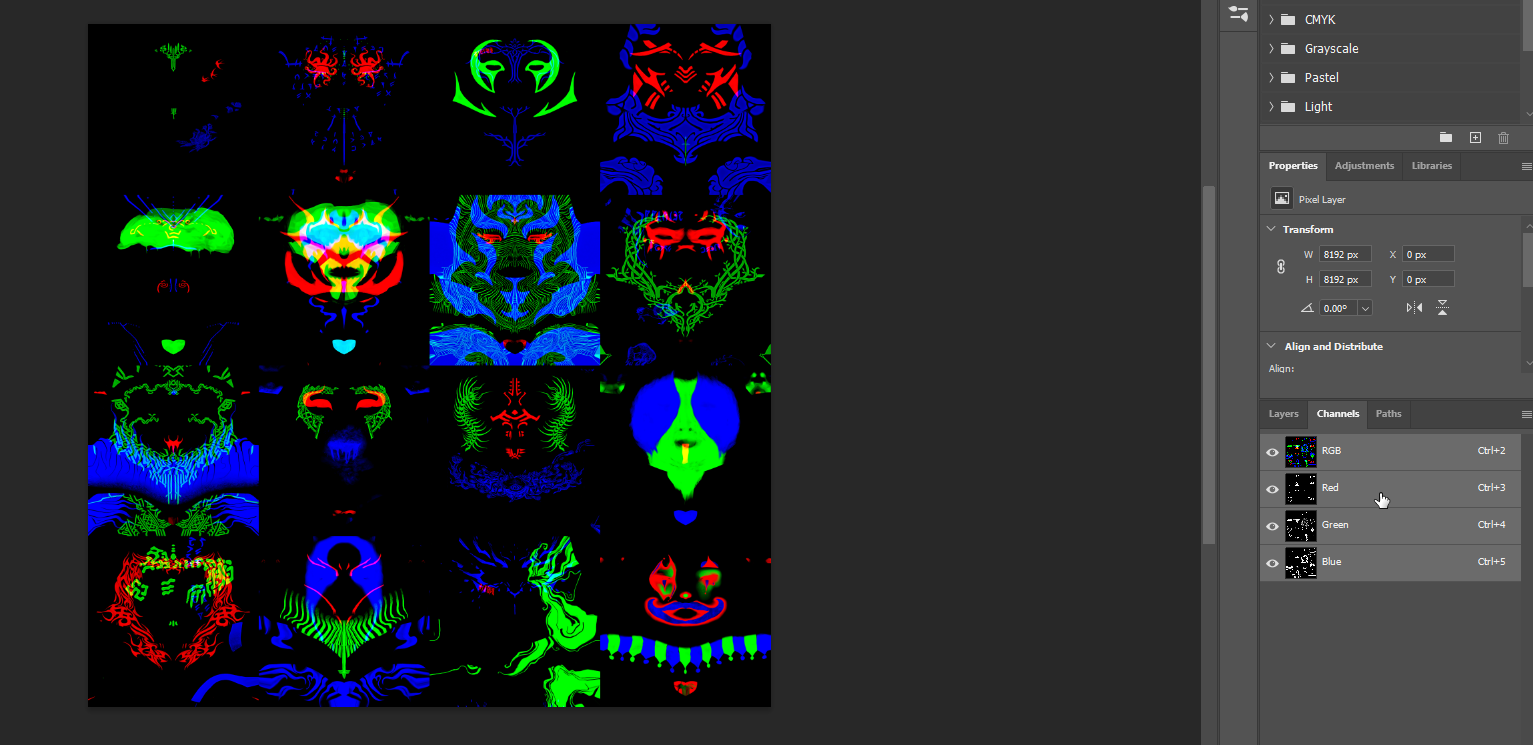
- The tattoo atlases in all cases are set up by editing each RGB channel independently (either by decomposing in GIMP, or directly editing channels in PS)
- The makeup atlases are edited in the same way, but only have the red channel to work with. Green is used by the game for gith spots
They look like this:
¶ The vanilla files can be found here:
..\Baldurs Gate 3\Data\Generated\Public\Shared\Assets\Characters\_Models\_SharedAssets\SHARED_Atlas\Resources
- Tattoos
Skin_Atlas_Head_SHR_Tattoo_A_MSK1.DDS - Makeup
Skin_Atlas_Head_SHR_Makeup_A_MSK2.DDS
¶ If using Unique Tav or Kazstra Virtual Tav, they will be located here:
..\Baldurs Gate 3\Data\Generated\Public\Shared\Assets\unique_tav\FACE
- Tattoos UT
Skin_Atlas_Head_SHR_Tattoo_A_MSK.DDS - Tattoos KAVT
KVT_Head_Atlas_Tattoo.DDS - Makeup UT
Skin_Atlas_Head_SHR_Makeup_A_MSK.DDS - Makeup KAVT
KVT_Head_Atlas_Makeup.DDS
¶ Body tattoos are effectively only usable for the player character if using mods like UT or KAVT
Location for UT and KAVT is
..\Baldurs Gate 3\Data\Generated\Public\Shared\Assets\unique_tav\BODY\TATTOO
- as
Skin_Atlas_Body_UNI_Tattoo_A_MSK.DDS
This tutorial focuses on simply creating face tattoos (or makeup) and then putting them on a vanilla atlas. For specifics regarding KAVT it is recommended to check out the articles and resources found here on the Nexus page
¶ Creating a tattoo in Blender
There is a Youtube video (silent with captions) going over this part for those who prefer it:
https://youtu.be/sHszyXyko0Q
While we can directly paint onto a head model without textures, it is recommended to use Volno’s Texture Toolbox. For this purposes the setup is easy as the blend file already contains a vanilla head hooked up to the shaders, we can use this.
¶ Initial setup of meshes
First, hide everything aside from the head meshes and lights. Now we want to join the ears to the head mesh - this will allow us to paint over both as one mesh.
To do that, rename the UV maps of the ears mesh so they are identical to those of the head mesh. The UV maps of the ears should look like this:
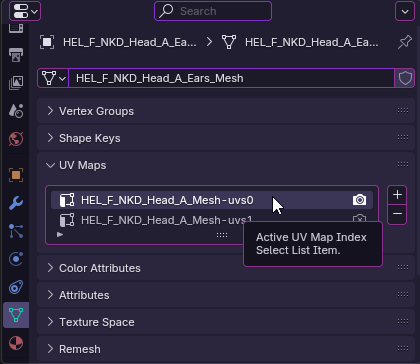
Now select the ears, then head and Ctrl+J to merge them.
¶ Setup of shaders
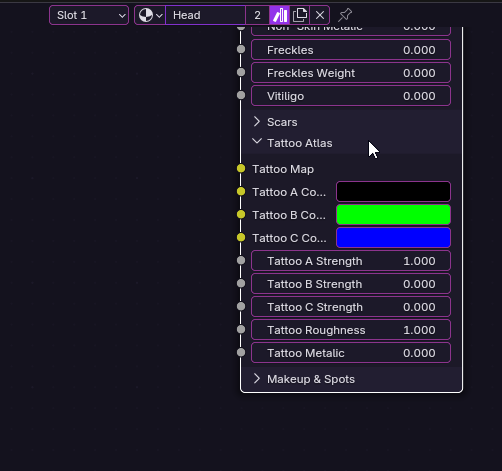
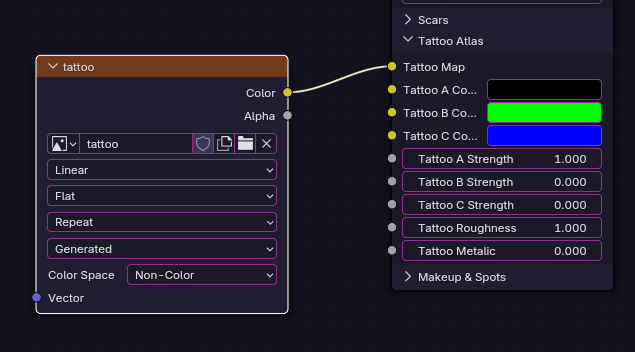
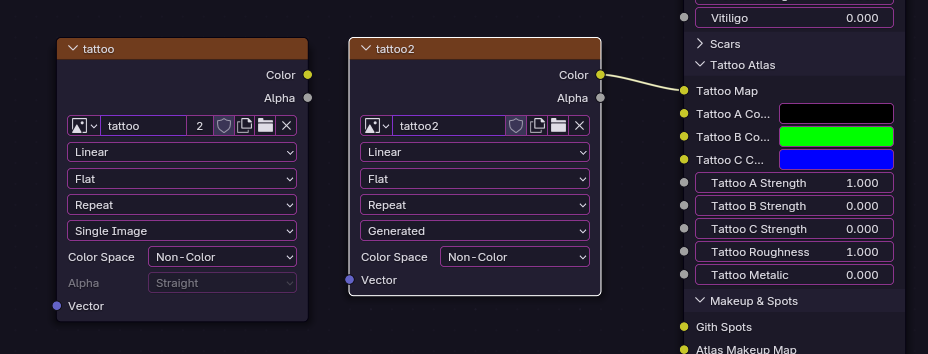
Head over to the Shading tab, select the head and zoom in to find the tattoos/makeup nodes, expand the Tattoo Atlas part. If we wish we can change the colour which shows in Blender (in this case we’re just using Tattoo A so will set it to black and with a strength of 1 - fully visible):
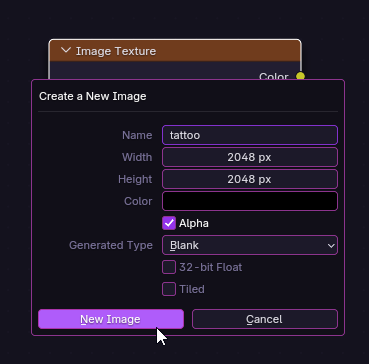
Now, create a new image texture by clicking anywhere outside of the nodes, right click -> Add -> Texture -> Image Texture
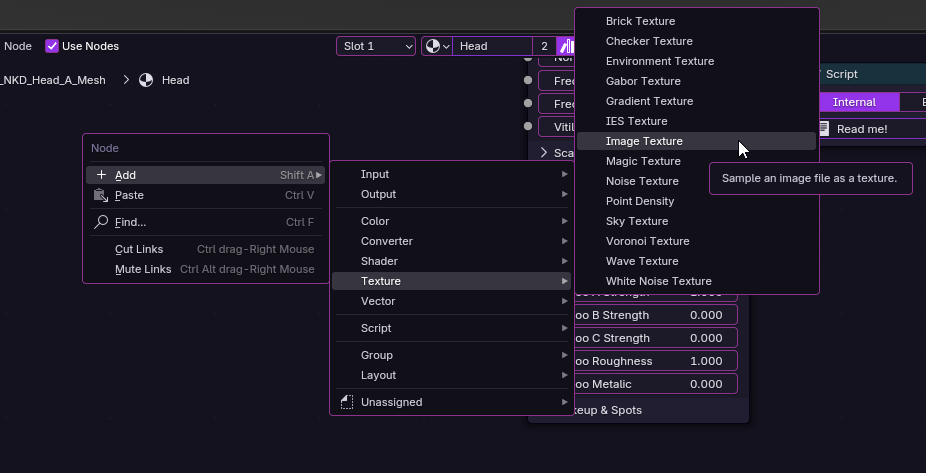
Rename it (this will be the name of our tattoo png which we will later place on our atlas), and resize to 2048 if using the upscaled atlases:
Now hook the two up:
¶ Setup of Texture Paint workspace
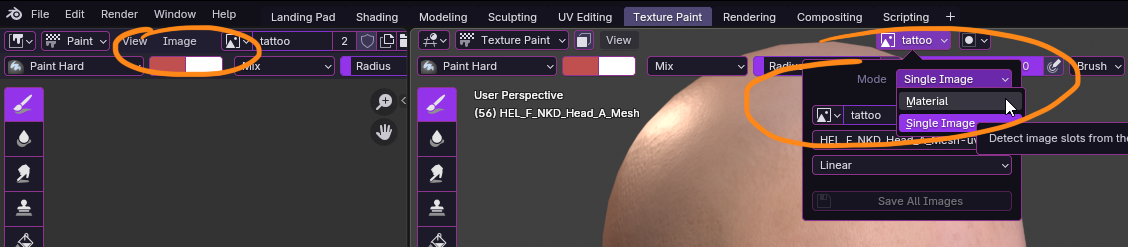
Now we finally switch to the Texture Paint tab. Resize windows as per preference then make sure both the image on the left and right are set to whatever the tattoo was named. On the right also set it to Material mode like so:
¶ Some important tools to note
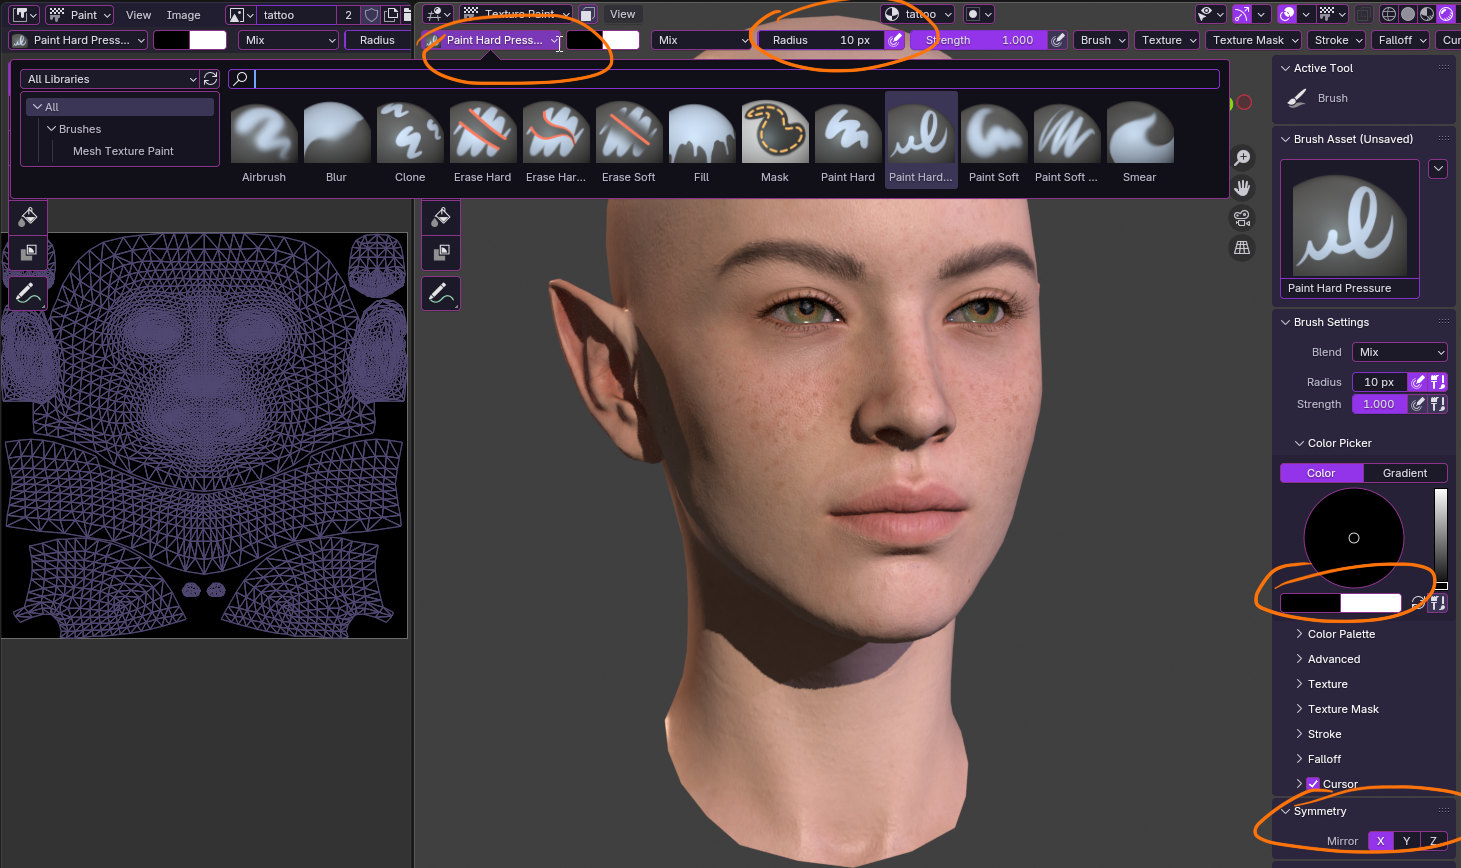
The basic tools we will be using are brushes (some of these can use tablet sensitivity), radius, the black/white spectrum, and symmetry:
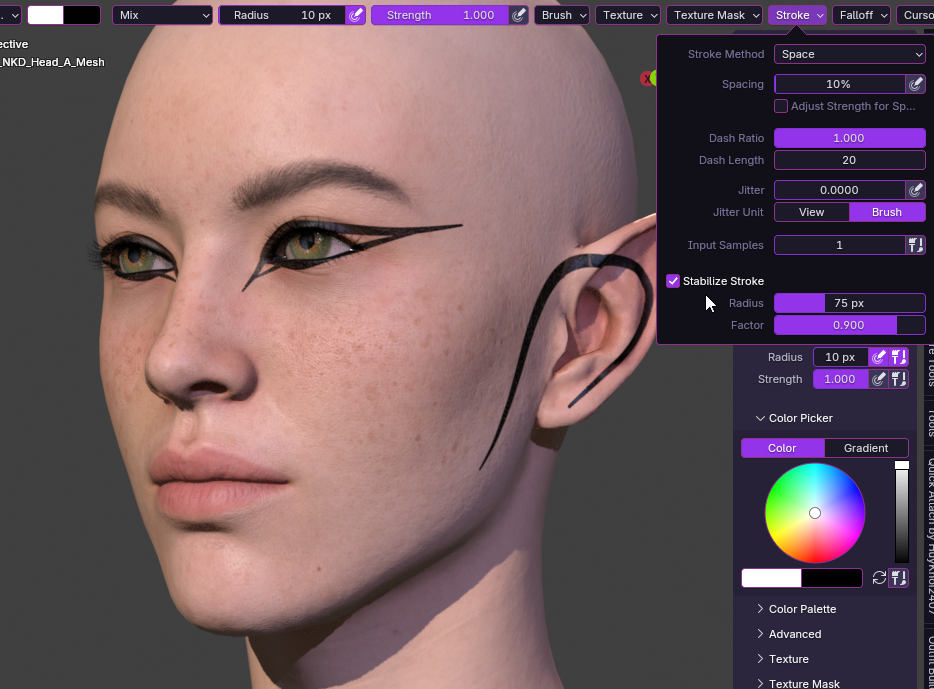
Another useful tool, especially for lines and curves, is brush stabilizer found up here (play around with Radius and Factor to preference):
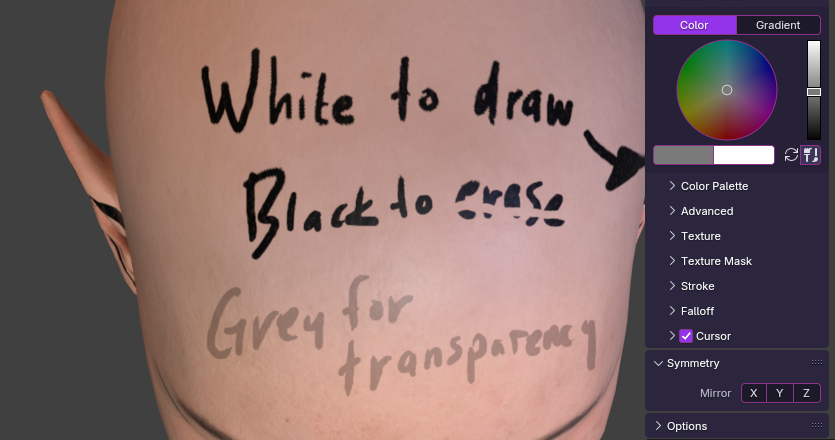
And finally, since tattoo/makeup maps are black and white masks - we will primarily be painting with white to draw the tattoos/makeup. Black will “erase”, and everything in between may be played with to work with transparency.
Brush Strength can also be used for transparency, just note that it works additively which may not always be desired.
¶ Saving the image (save often just in case!)
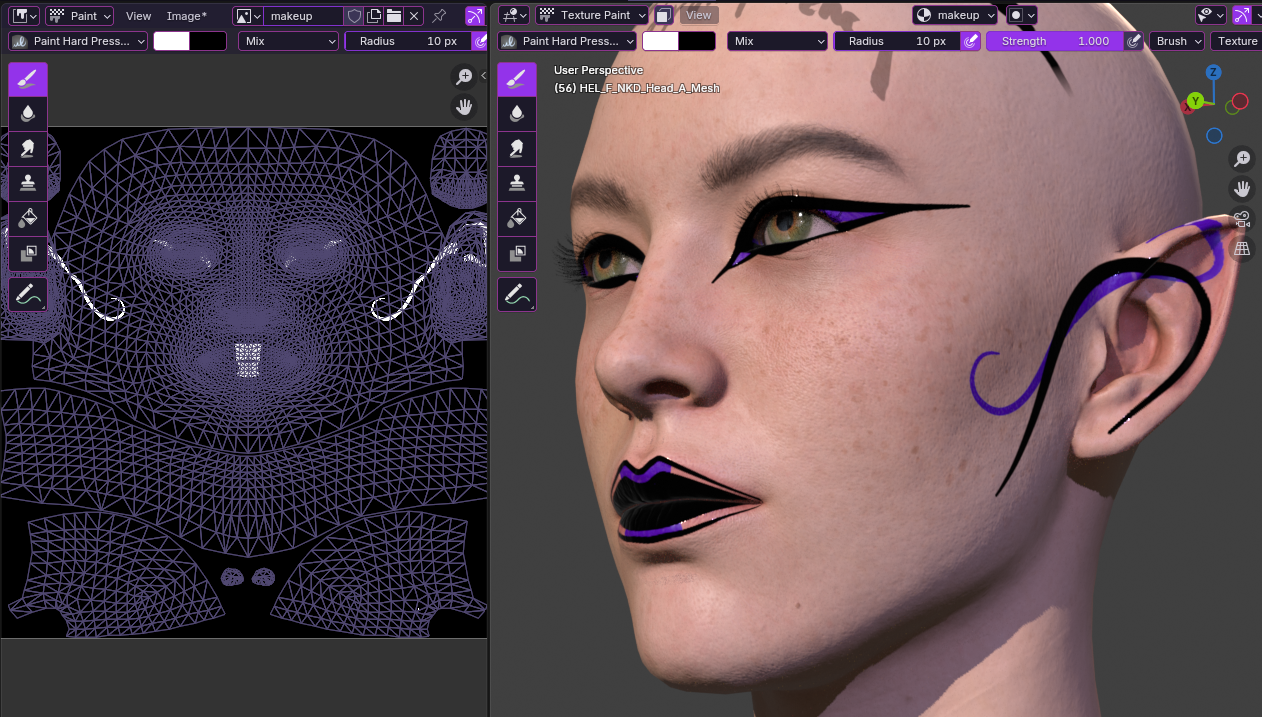
As we paint, we see this projected onto the head/ear UV map shown in our tattoo image like so:
(orange text added onto screenshot - not part of the tattoo)
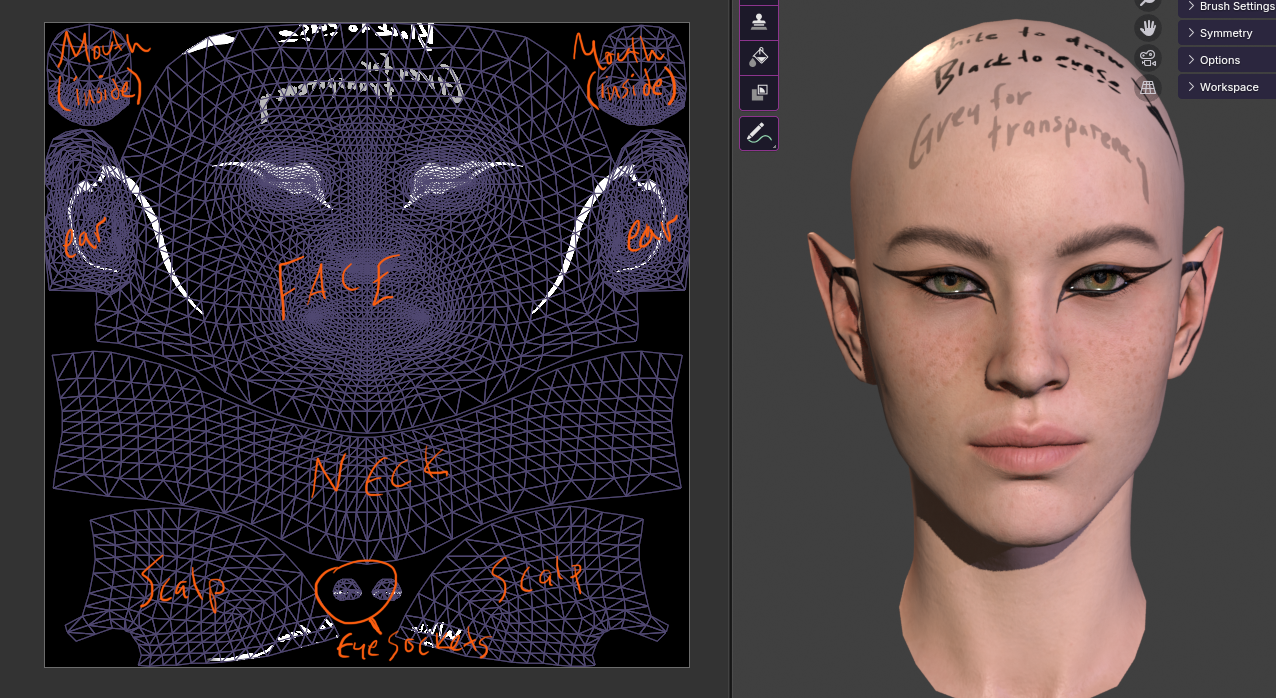
We can see the lines that transcend the UV seams automatically get mapped as appropriate for seamless transitions - this is one of the major advantages of doing this in Blender vs 2D editing of the tattoo maps alone!
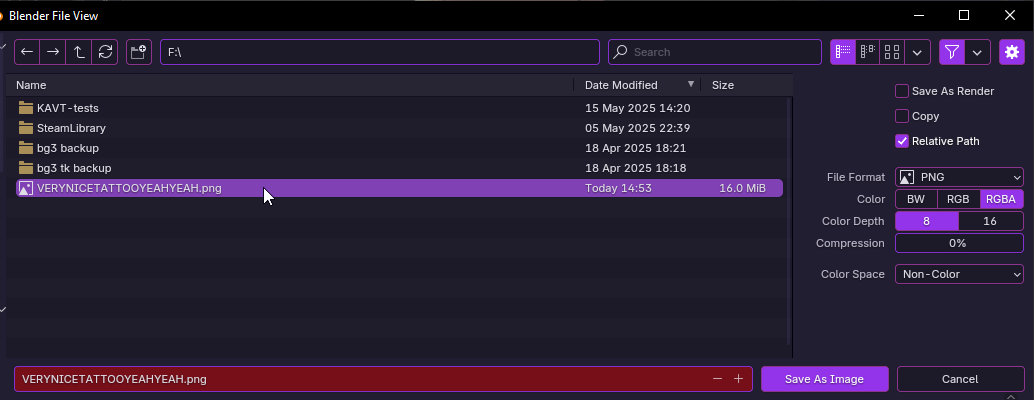
So when we’re happy with what we did we save (you should be saving often anyway, you never know when Blender may crash):
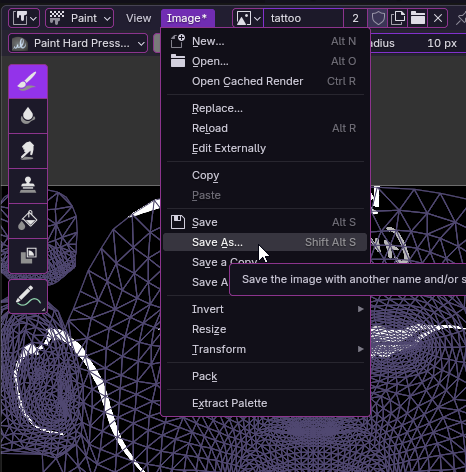
Put it somewhere in your working files:
Good job! Before we exit Blender and continue to Photoshop (or editor of choice), we may want to make more because now we got the flow right?
¶ Creating multiple tattoos
There may be a better way of doing this, but here’s a way to kind of organize it.
Unhook your tattoo node and create another, hook it up and now we’re making a second separate image:
Note that the tattoo and makeup images are essentially interchangeable, both here in Blender as well as on the atlases - the only determining factor is which atlas you put it on whether it shows in game as as makeup option or tattoo.
What we can do here for funsies is hook one up to tattoo and the other to makeup. Give one a separate colour to better see what you’re doing (this is only in blender, our image will still be greyscale).
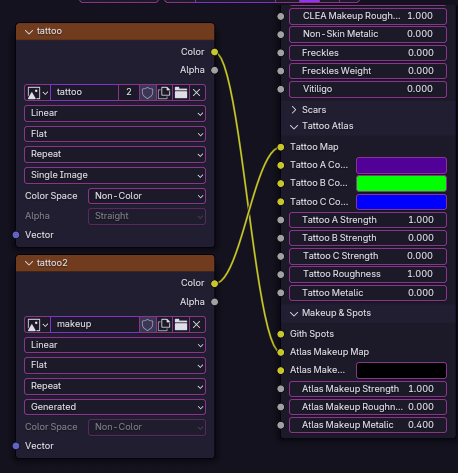
The image below is a demonstration of that.
Note: The Toolbox shaders show so as the tattoo overlays the makeup - as of writing this I don’t believe the game’s shaders work this way. From what I can tell the makeup set at 100% intensity will completely overlap the tattoo, and values below that will be mixing the two.
Ok now we move on.
¶ Editing your atlas
Here is where things may differ due to different graphics programs as well as different atlas sizes such as those between vanilla/UT and KAVT. Again, for KAVT specific info please check out the articles on Nexus as well as the provided working files for editing the special KAVT atlases!
Assuming we are working with the vanilla or Unique Tav atlas, we can already grab Soriyumi’s Upscaled Tattoos and Makeup from Nexus as a template to work with. These are 8192x8192 and will work out of the box with our 2048x2048 tattoos/makeup.
¶ Photoshop guide
Open the atlas DDS and copy the contents of each channel into layers for better editing:
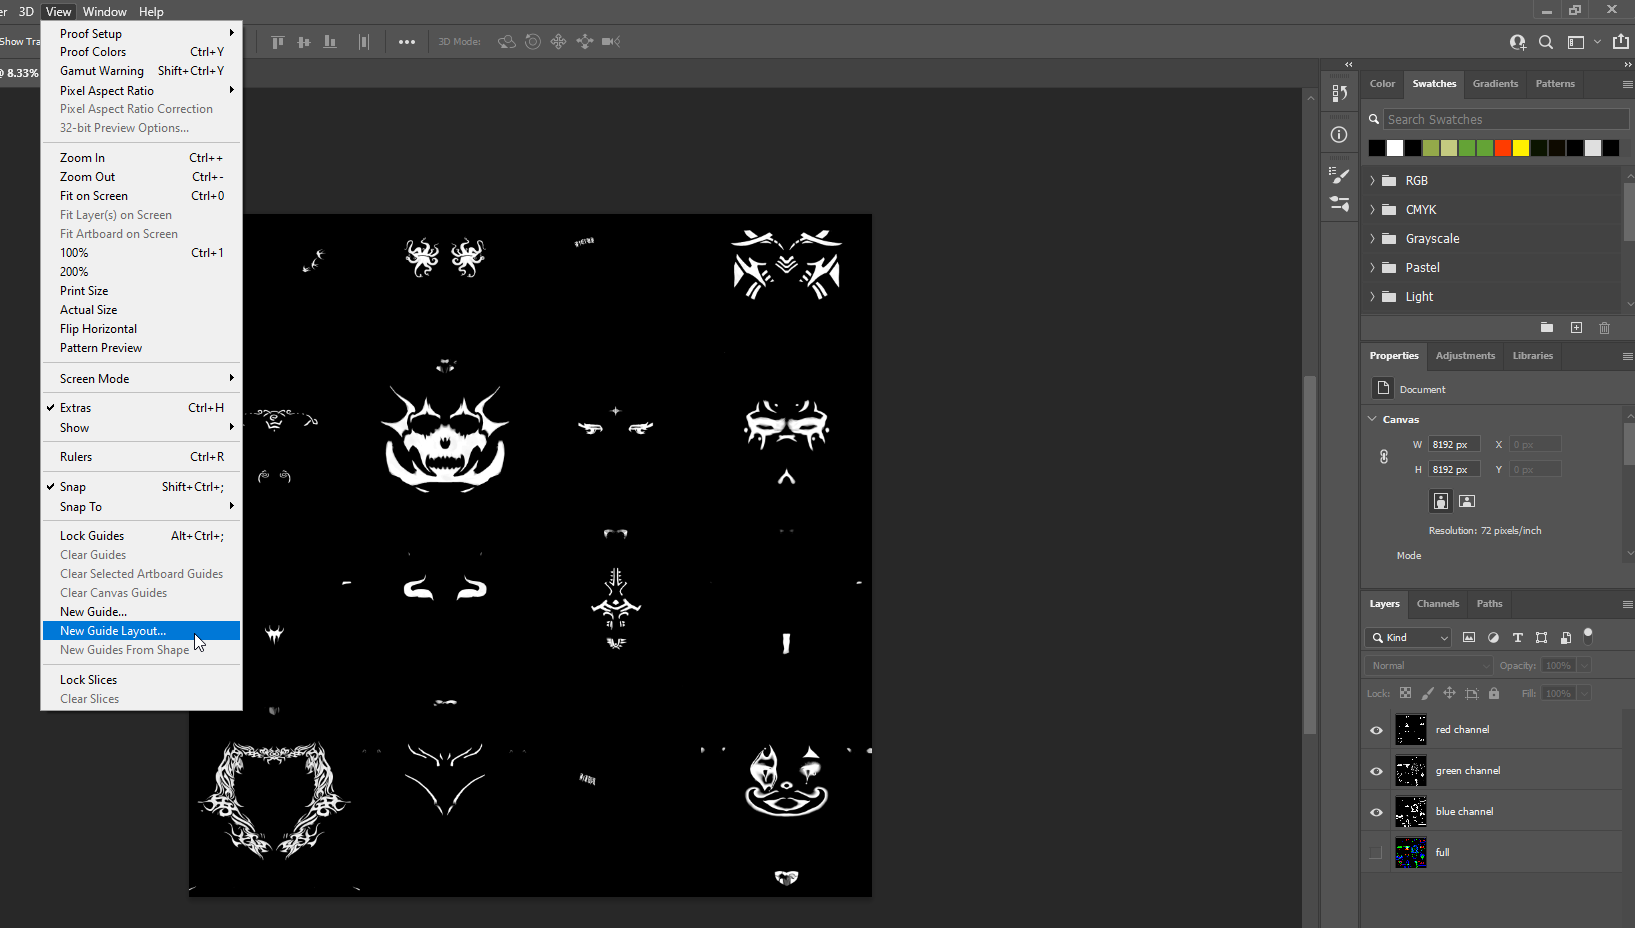
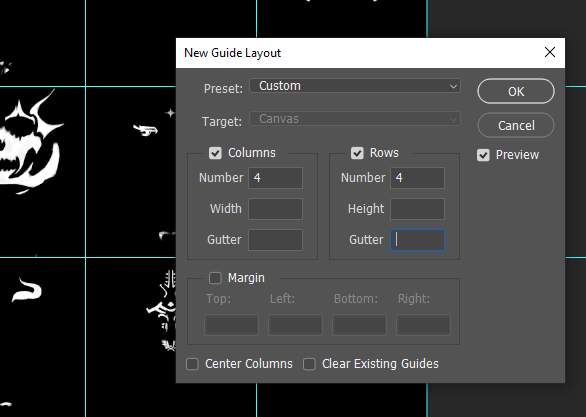
Now create a new guide layout with these settings:
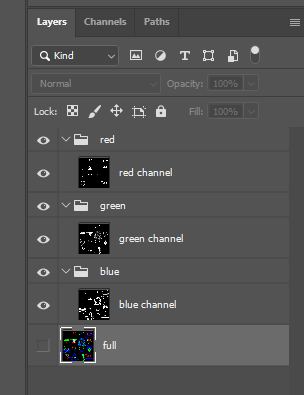
If you are editing many tattoos that spread across more channels, it may be useful to organize your layers into groups:
So, now we can open our tattoo image into Photoshop as well (it opens in a new tab), select all then copy and paste into our atlas psd (remember to save your working file as you go). Now move it to the spot you’d like to replace (it should snap into place when you are near):
Once done with adding all tattoos, save this psd to have a future save point to edit further. Now save as and call it something like tattooedits-merged.psd. This is the one we will continue with.
Merge each layer group into themselves, then copy each one into their respective channel of the full/main atlas layer as seen below (note that the green and blue channels aren’t edited here thus no change is seen for those). After that flatten the image:
Now save as DDS (keep that extension all caps):
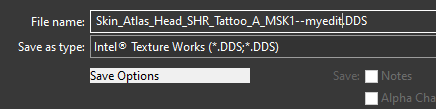
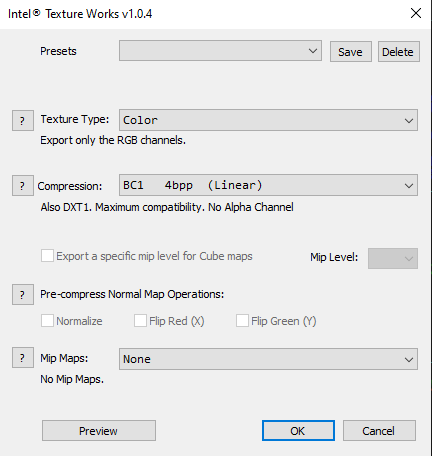
And use these settings (this may differ depending on DDS plugin. Shown below is using Intel® Texture Works Plug-in)
Important: BC1 Linear and NO mipmaps
Now rename your file to match exactly the one you are replacing and place it in the game files in the appropriate place (see The Basics at the beginning of this tutorial).
Done!
¶ GIMP guide
…someone help me here xd
feel free to edit
¶ Body Tattoo addendum
Essentially this is the same process as face tattoos and makeup, however there are a couple extra steps to set it up first.
¶ Import a Body Mesh
Volno’s Texture Toolbox already comes packaged with a head that matches up with HUM_F_NKD_Body_A.GR2 so we may just import this. For the purpose of this example I’ll be using HUM_M_NKD_Body_A.GR2 and a matching head.
Once you import, delete the LOD meshes, then select the Body mesh in Object mode.
¶ The Shader Tab
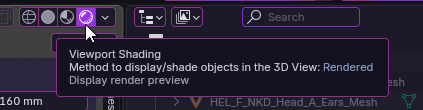
Now head over to the Shader tab, and for Viewport Shading turn on either Rendered or Material view if it isn’t already:
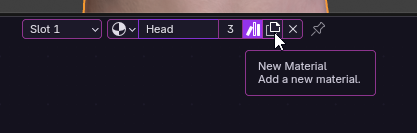
Make sure the body is still selected, then in this drop down menu we grab the “F Head” preset.
Now with this button we duplicate it:
And then rename:
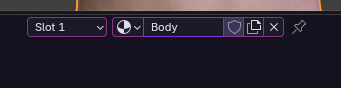
Now it is separate from the head shader. But!
It still looks like this:
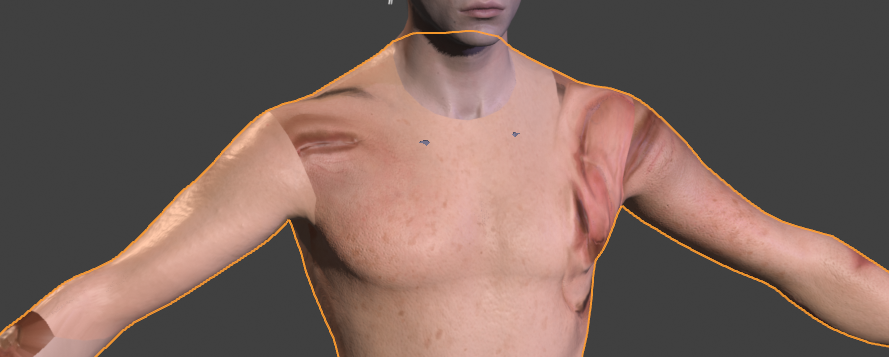
¶ Assigning the Textures
In the area where all the nodes are below, you may need to zoom/pan a bit to get it in view if it isn’t already. Then we find where our 3 skin textures get hooked up (we will only be changing the CLEA, HMVY, and NM).
Expand each one and get rid of the face texture occupying it:
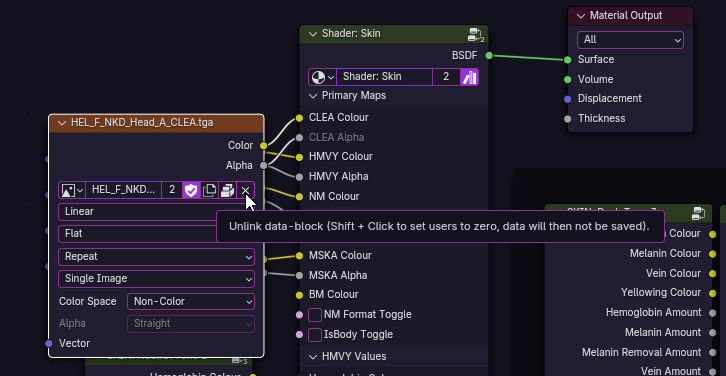
Then choose “Open” and find the associated body texture you need, remember to set it to “Non-Color”:
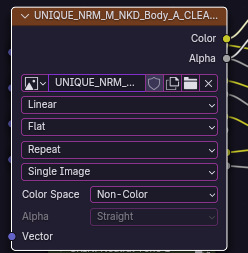
Do this for the other 2 (HMVY and NM).
¶ The Tattoo Texture
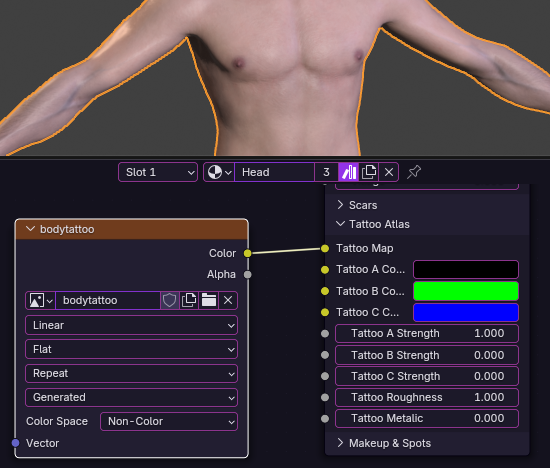
Now click on some empty space down where the nodes for the Makeup and Tattoo atlases are, right-click, Add -> Texture -> Image Texture.
Name it whatever and give it a 4096x4096 dimension (we can also do 2048, but it’s easier to downsize in post than upsize), set it also to Non-Color. Then hook it up to the Tattoo Map, set the Tattoo A color to whatever, and the Tattoo A Strength to 1:
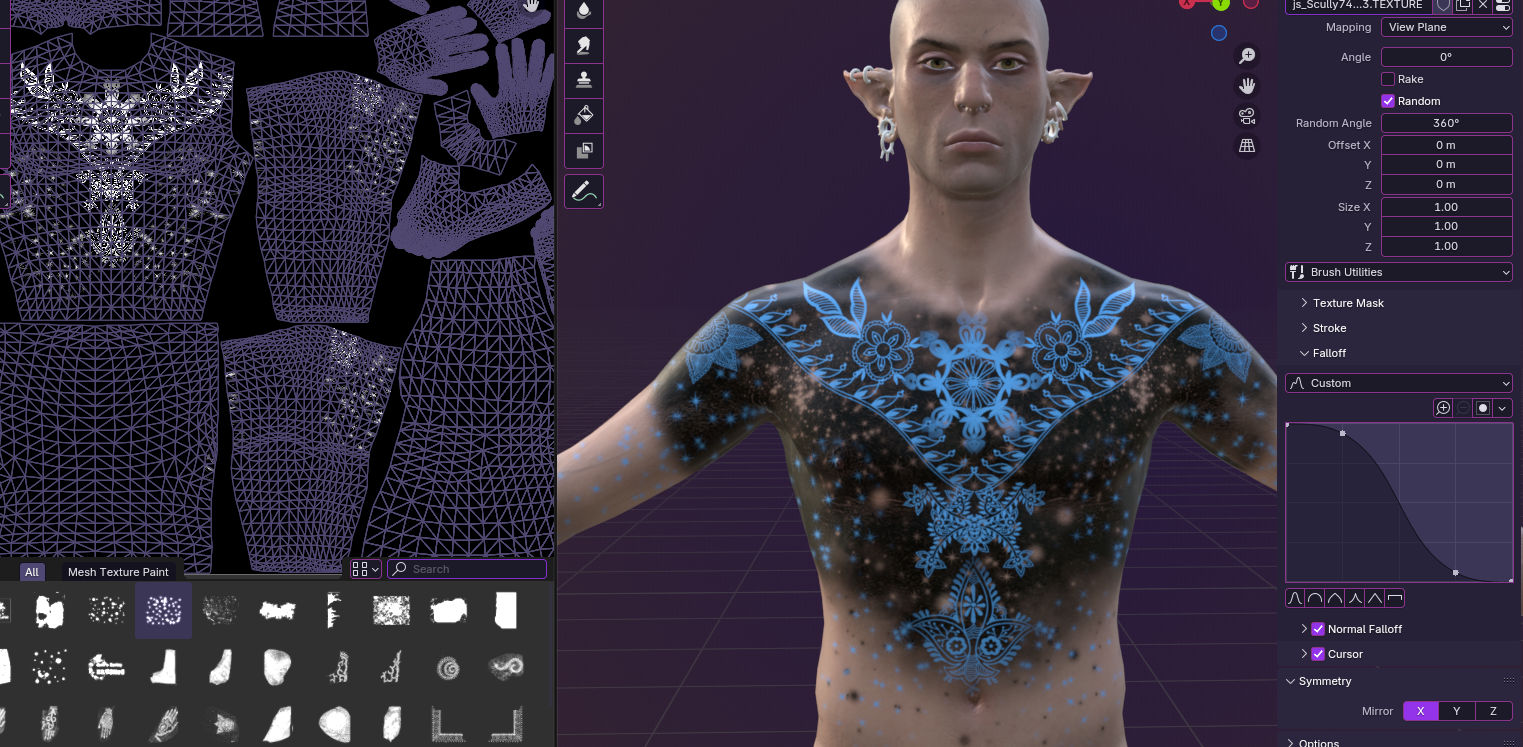
Make sure that the body tattoo texture node is selected, then head over to the Texture Painting window. You may need to set this one to Material/Render Viewport shading as well.
¶ Texture Painting
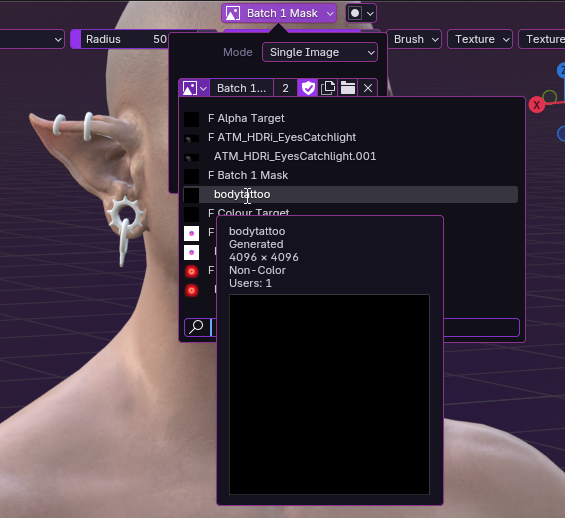
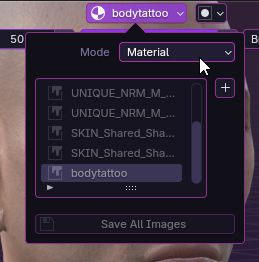
This will essentially be the same as it is with Face Tattoos. Remember to go up to the texture drop down menu in both in the UV section and the Viewport section, and set them to your Body Tattoo texture:
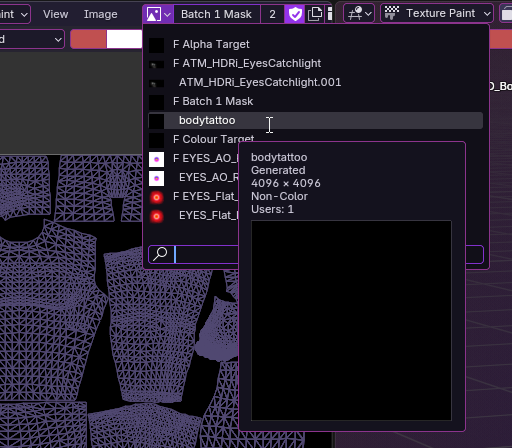
For the second one we may also need to set the Mode to Material instead of Single Image:
Now we can paint as we do with Face Tattoos. Remember we are working in greyscale: white is to draw, black is to “erase”. Playing with gradients is allowed.
¶ Notes
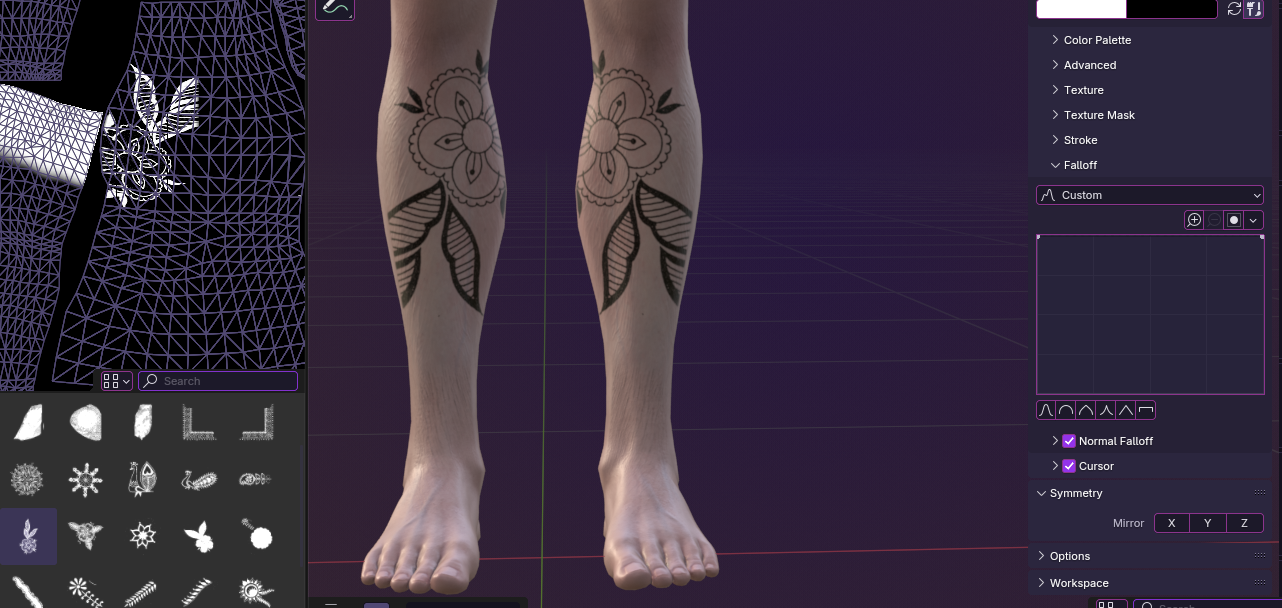
The legs of the body meshes are a bit special in that both right and left share the same UV. This means they will always be mirrored, whether we paint with X-Symmetry on or not:
¶ Visualizing a Second Tattoo
To set up a second tattoo, for example if one wants to use a glow tattoo in addition to the normal one using KAVT, this is easy to visualize.
Go back to the Shading tab, add another new image texture (4096x4096 again), name it, then hook it up like so:
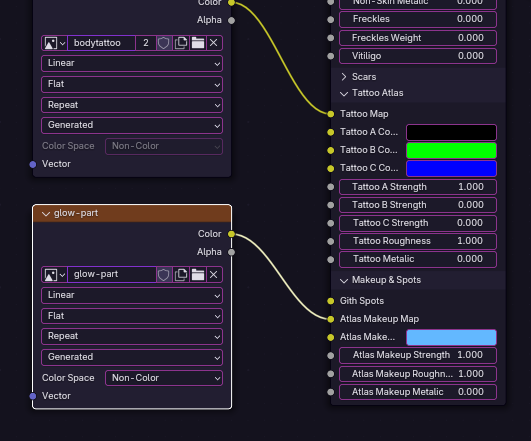
Remember to have this node selected when painting this texture. If you wish to paint on the “normal” tattoo again, select that texture first then continue.
This results in a completely separate map which we can combine later in post. For instructions on how to do this with KAVT, follow the guide here.
Remember to save the images as you go!