¶ Introduction
This page is a list of miscellaneous tips on using the BG3 Toolkit for modding compiled from various experiences of CMTY members!
¶ General
- The Source Assets Data folder does not have to be in your specific mod's project folder. It's probably better to leave it outside of your mod's project folder so it doesn't get packed along with the mod and increase the file size. You also don't need to change the source assets data folder every time you load a new project this way. The important part is the folder must be named “Data”.
- You can delete an item in the Resources section by hitting the “Delete” key on your keyboard. There’s no option to delete from the right-click dropdown menu.
- To close the toolkit, hitting the “X” button will likely cause it to slow down your computer before finally closing. Use the File>Exit dropdown menu for smoother, faster exit.
- Hotloading works within the toolkit, but in game you have to make sure you have not a locally published file - instead grab the green "mod" shown in inactive in BG3MM to make those toolkit files active.
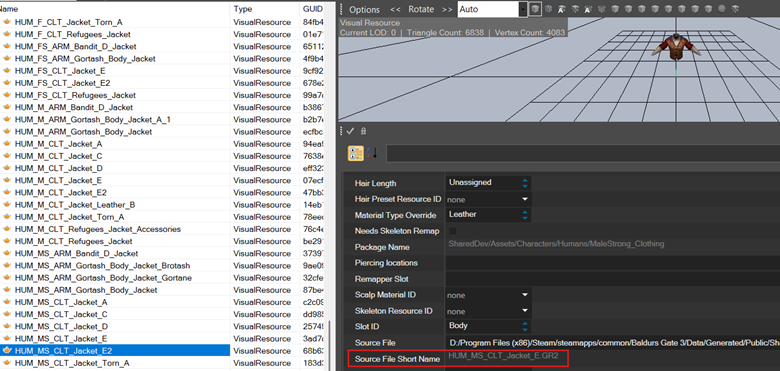
- Sometimes the name that appears in the resources browser is not the same as the actual name of the file. (For example it can be HUM_M_CLT_Jacket_E2 in the browser but the actual GR2 file name is HUM_M_CLT_Jacket_E) You can find the actual file name in the properties tab, at the Source File Short Name.
¶ Making Patches for Your Mods in Toolkit
- You can create a patch for your mods by listing your main mod as a dependency.
- Restart your toolkit after you set the dependency.
- Your main mod files should be visible to you in the resources browser.
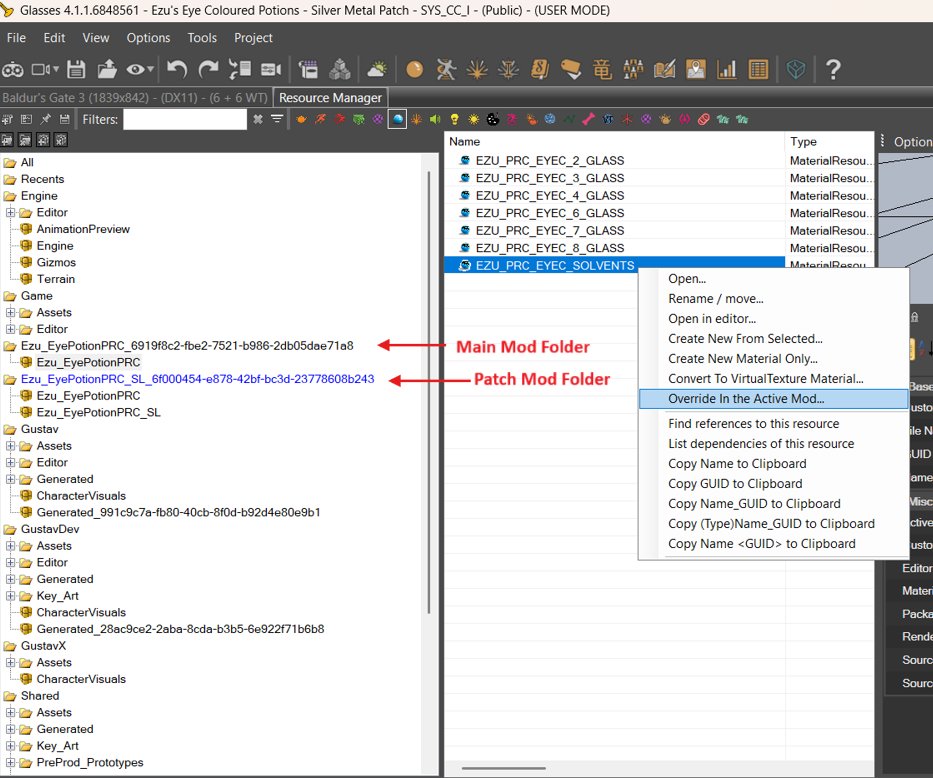
- For example if you want to change the colour of a material in your main mod, you can now select “Override in Active Mod” from the Resources browser.
- If you are making a patch for another author’s mod, you need to import the mod into your toolkit first. (Make sure to obtain permission from the mod author).
¶ Visual Modding
- When you add things to Character Creation (e.g Hair, Head etc) you might need to restart the toolkit for them to appear in the Character Creation menu the first time.
- The name of the VisualResource is important for equipment. They must start with race_body type (e.g. HUM_M) in order for them to show up in the Visual Resources Editor of the Equipment Data.
- You can update your texture and skeleton files by dropping them in the Assets folder and overwrite, instead of reimporting them into the toolkit every time. Reimporting also likely will cause toolkit to crash so it’s easier to just overwrite the files directly. (This also works for GR2 files but Toolkit can be more finicky about it)
- Selecting “Create new material only” for materials will make a new custom material without making a new custom shader in your mod. This is important when you intend to publish your mods to consoles.
- You can change the shader of your custom material by clicking the 3 dots at the Source File under the Properties of your material.

6. If you select Render CC Icons / Render Equipment Icons it will render icons for ALL vanilla items as well, so it will take a long time. For equipment icons there’s a way to make it faster here.
¶ Cloth Physics
- If your GR2 has cloth physics mesh, you need to parent the mesh with physics to its cloth physics mesh in the Proxy Simulation tab. To do this, drag the mesh and drop it under the bolded cloth physics mesh. Example:
- The cloth physics mesh should be the last mesh in your export order, otherwise some submeshes will disappear from the Visual Editor causing you to not be able to assign materials to it.
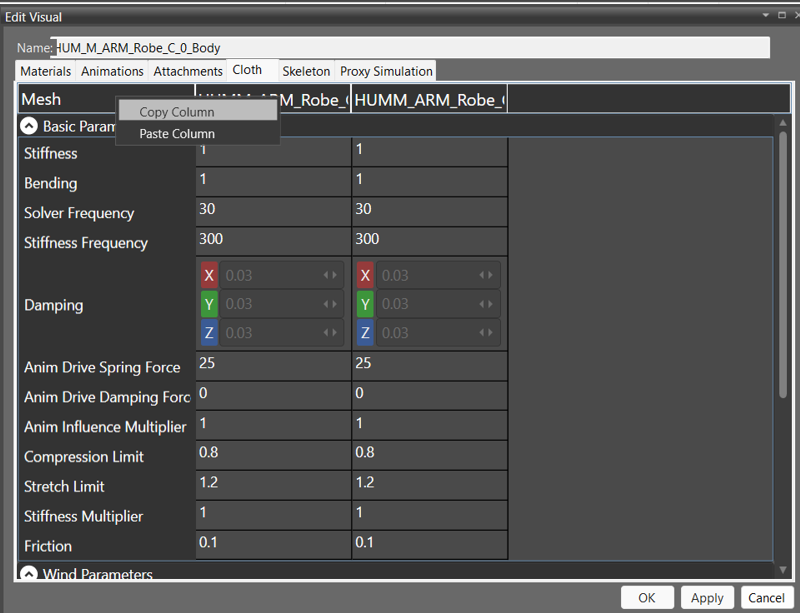
- You can copy an entire column of cloth physics parameters from one visual resource to another. (Right-click>Copy Column)